Creating a Decal Material
This guide
will show how step by step how to create a decal material. The process consists
of two parts, first, creating the source decal material in Photoshop. The second
part is converting this Photoshop image into a format recognized by the game
engine, there is a standalone tool that takes care of this part.
A source
decal material is a Photoshop file that will contain one layer per decal. The
alpha channel is shared by all the decals, which means there can�t be any
overlapping layers. For efficiency, layers should be sized in powers of two
(32x32, 64x62, 128x128, etc).
Part 1 � Creating the source decal
texture with Photoshop
Start by
creating a new 512x512 image in Photoshop.
Go to the
�Layers� tab and click on �Create a new Layer�. The �Background� layer should
be left empty, you can lock it if you wish, and it is recommended that you hide
it.

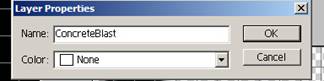
Right
click on the layer name (the area highlighted in blue) and select �Layer
Properties�, the layer name will represent the decal name, so name it something
meaningful and easy to remember. In this example, we name our decal
�ConcreteBlast�.
Right
click on the layer again, this time select the option �Blending Options�, THIS STEP IS VERY IMPORTANT, if you
forget to do this, the alpha channel will not get exported correctly and decals
will look opaque or may not show up in the game. In the dialog that appears, uncheck the option Transparency Shapes Layer. YOU
MUST DO THIS FOR EVERY LAYER THAT YOU ADD. Don�t forget.

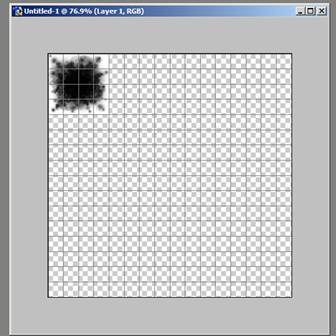
Now you
can draw the decal into the first layer. As a suggestion, select the area that
represents the size of the decal. In this example I selected a 128x128 area,
and pasted an existing blast mark decal into it.
Now we
need to add the alpha channel for the image, click on the �Channels� tab and
then click on the �Create New� button. This will add an empty (all black) alpha
channel. Remember that the alpha channel is shared by all decals, so you must
be careful of placing the alpha information for each decal in the right place.
This is another area in which working with a grid is very handy.

Now draw
the alpha for this decal, make sure it�s correctly placed under the correct
decal layer.

Now that
you have one decal correctly setup, you can add a new one. It can be of a
different size, as long as it doesn�t overlap with existing decals, and that it
has a power of two size.
The
following is an example of what a decal texture with more than one decal would
look like. Notice how it�s possible to have different sized decals anywhere in
the texture as long as they do not overlap.

The layer
set for this decal texture is the following.

And here�s
what the alpha channel for this decal texture looks like:

Finally,
you need to save out this decal texture as a Photoshop PSD file. Make sure that
the �Layers� and �Alpha Channels� options are checked:

Part 2 � Exporting the decal
texture for use in the game.
To export
the decal texture into a format used by the game you need to use the �Decal
Material Tool�

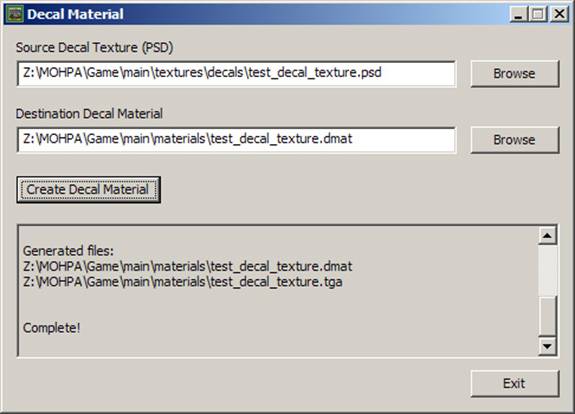
Start by
setting the �Source Decal Texture� which is the Photoshop PSD file, you can use
the browse button to look for it. Then select the destination file for your decal
material. This tool will create two files, a file with a .dmat extension and a
.tga file with the image data. The two files will have the same name and will
be placed in the same folder as the destination path.
Click on
the �Create Decal Material� button, if everything worked correctly you should
see a message such as this:
Generated
files:
materials\decal_texture.dmat
materials\decal_texture.tga
Complete!
When
you�re done, you can click on the �Exit� button to close down the decal
material tool.
PART 3 � How Decal Materials are
used in-game.
Decals are
applied in the game using collision materials, this means that the collision
response spreadsheet must be setup to use decals. Open the collision response
spreadsheet, usually at:
collision_materials\collisionresponse.xls
which is
stored in the rez file:
main\pak0.rez
Open the Material Properties sheet, now look for
any instances in which the Command
is blastmark this command will be
used for decals, so in the FX Alias for a blastmark you will write the decal
name you want to be applied when an explosion goes off on a surface of a given
material name.
Example:
Command�������������������� Material Name������������ FX
Alias����������������������� Snd Alias
���
���
blastmark������������������� Concrete�������������������������������� Concrete_Blast
���
���
���
blastmark������������������� Grass�������������������������������������� Grass_Blast
In this
case, when an explosion goes off on a Concrete surface, the decal that was
named �Concrete_Blast� in the decal material will be applied. If an explosion
goes off on a grass surface, it will then apply the decal associated with the
name �Grass_Blast� in the decal material.